
Butter making is an art that is not practiced often in our busy modern world. The small home farms that used to make their own butter and sell a few pounds to neighbors are mostly gone. In todays fast pace very few people want to be tied to a milk animal that must be milked every 12 hours. We want to show you the process of making butter on our farm, starting with the cow. The follow pictorial will demonstrate butter making and provide you with a reliable guide to make your own fine crafted butter. Don't forget to get the homemade bread started to go with your butter.
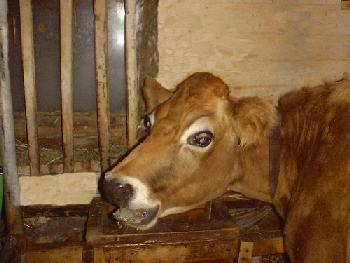
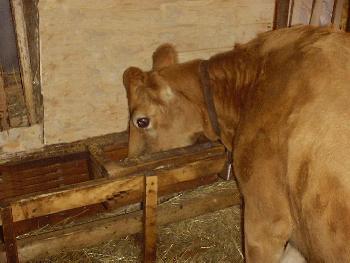
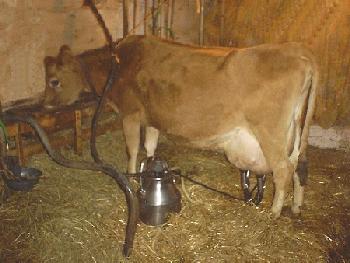
Good products start with clean healthy cows. Our Jersey Buttercup is provided with a 20% dairy balance and also gets vitamins and salt with selenium to assist her dietary needs. During the summer she grazes with the other animals on rotated pastures night and day just coming in for feeding and milking. A large shelter in the pasture gives them a place to stay out of the rain. Winter time brings the animals in the barn for most of the time. Our winters can be quite brutal so the cows may stay in for days at a time, but they do go out when ever the weather permits. They are fed a high quality hay several times a day.
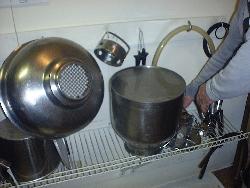
Just as important as healthy cows is clean milking equipment. The milking machine is sanitized each time it is used.
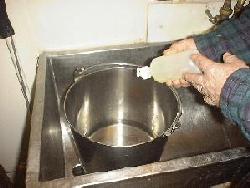
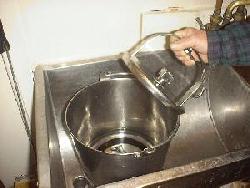
After use, the milking equipment is washed in a dairy soap that limits soap residue and allow to air dry. Once a month it is acid washed to take care of calcium deposits on equipment.
Before milking the cow's udder is cleaned with an iodine solution. She is milked while she eats her morning or evening grain, and is then served a big helping of hay.
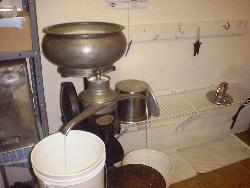
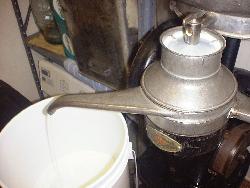
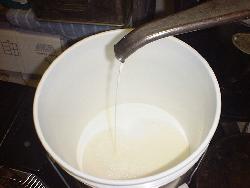
After milking the milk is taken right up to the milk room and separated, the cream is chilled and the skim milk is taken out to the pigs or chickens. A cream separator separates the cream from the whole milk leaving skim milk, you can chose the thickness of the cream by adjusting a screw on the separator. Centrifugal force causes the heavier cream to rise and be poured out the upper spout while the skim milk is poured out the lower spout.
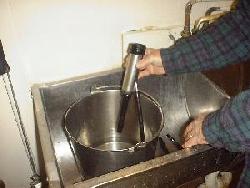
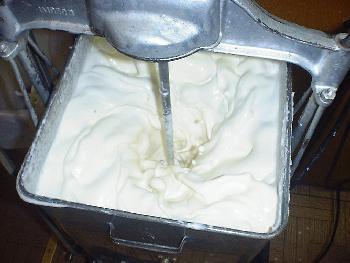
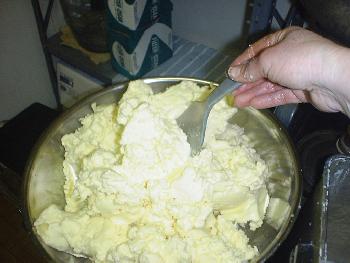
Butter making starts with warming the cream to about 65 to 68 degrees. The cream is added to the churn to begin the process. The churn is filled about 3/4 full. Mixers make very poor butter because they "whip" the butter causing the buttermilk to be mixed into the butter. A churn slowly agitates the cream causing the cream to thicken and then break into butter particles.
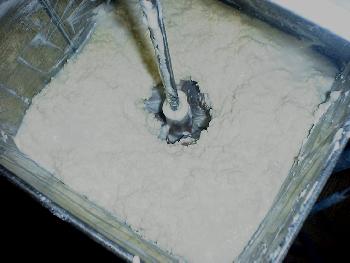
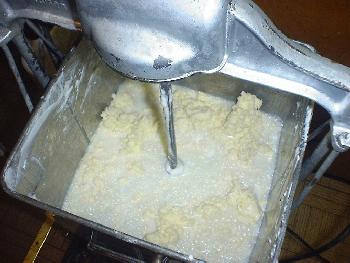
The butter particles are tiny to start with but soon gather together in lumps signaling that your butter is ready to take out of the churn. Do not allow the butter to become over churned by leaving it in past the lumpy stage, the butter milk will be beat into your butter and will be very hard or impossible to work out in the washing.
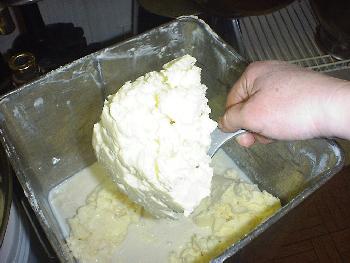
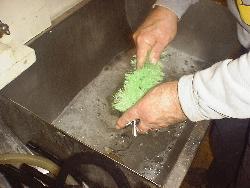
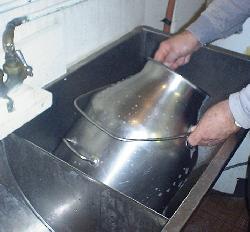
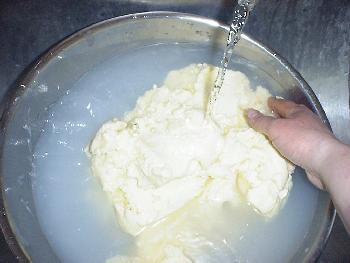
Washing the butter is next, the butter is removed from the churn and put in a large shallow bowl to rinse out the buttermilk. Lukewarm water is gently poured over the butter in a steady stream while the butter is worked. The butter is ready for the next step when the water runs clear during working. The wash water must be removed from the butter, it may be squeezed by hand or worked with a paddle on a tilted board.
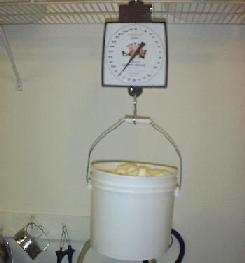
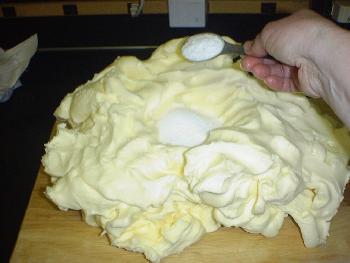
Next the butter is weighed so salt can be added. One teaspoon is the average amount of salt to add per pound. The salt must be worked in completely so it is homogeneous. It is best to use kosher or caning salt because it doesn't have the additives that are in table salt.
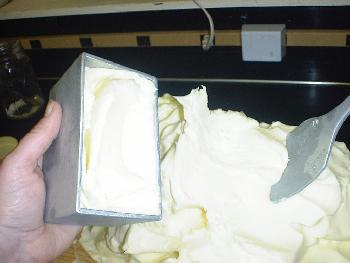
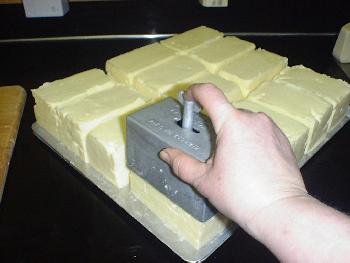
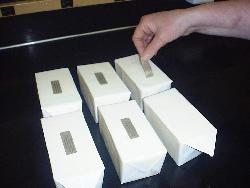
Now the butter has to be molded, I use a two piece aluminium mold that makes a one pound block similar to commercial butter. The butter is pressed into the mold and released on cookie sheets then placed in the refrigerator to cool.
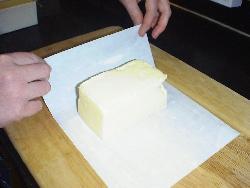
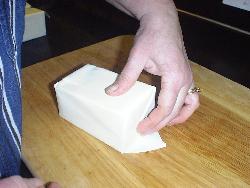
After proper cooling the butter is wrapped in parchment paper. The parchment paper must be soaked in water prior to wrapping. Wrapping butter in parchment paper is similar to wrapping a gift, the paper stays in place because it is wet. Parchment paper also keeps the butter fresh when stored in the refrigerator.
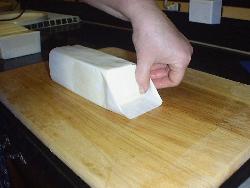
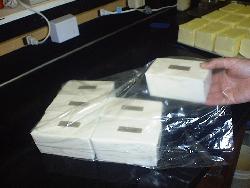
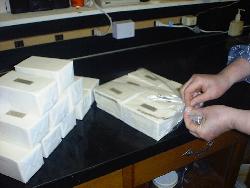
Each pound of butter is then labeled and placed in plastic bags prior to being stored in the freezer. Don't forget to keep a pound out for that fresh bread that must be almost done!
 Back to
the Top.
Back to
the Top.  Home.
Home.
 You can write us at our e-mail address.
Use your browsers back button to return to the previous page.